Tuesday, August 20, 2013

For my little boy...

Made this scripture photo for my little boy's room today... steal as you wish. : )

Saturday, May 4, 2013

Curried Cauliflower - It's like crack (not that I would know, Mom, promise)


Look at this stuff... take it all in. It tastes even better than it looks too, promise. Y'all mighta heard of roasting cauliflower in the oven before (it's the way to go, man. if you haven't tried it or curry isn't your thing, take the recipe below and swap the curry for Parmesan cheese), but this recipe is a variation with an added memorable kick of curry. Hope you give it a try!
 

Roasted Curried Cauliflower


Prep Time: 15 Minutes
Cook Time: 25 Minutes
Ready In: 40 Minutes
Servings: 8

Ingredients:
6 tablespoons olive oil
2 large heads of cauliflower, cut into bite-sized florets
3 Tablespoons curry powder (more if you'd like)
salt and black pepper to taste

 
Directions:

Preheat the oven to 450 degrees F. Cover a large cookie sheet with foil. Toss olive oil and florets in a gallon ziplock bag until cauliflower is coated. Add curry powder, and salt and pepper and toss again. Pour into the prepared cookie sheet, and sprinkle with more curry powder and salt, if desired.

Bake for 25 minutes, stirring halfway through. Broil for last 3-5min watching carefully so they don't burn. Enjoy!


Monday, April 15, 2013

New in Campbellstown - kitchen shelves

Every gal has her dream kitchen glittering somewhere in her mind - posh appliances, perfect cabinets, gorgeous dishes, miles of counter space, happy colors or maybe all white... My dream kitchen, you'll see if you follow me on pinterest (Campbellstown), is something like "cottage clutter" with wood floors, a pie safe, heaps of white ironstone, a spiral staircase, fireplace, apron front sink, and shelving instead of cabinets.
All three pics via Pinterest


My for realz kitchen (seen in this post), is home to an army of cabinets. I'm grateful for them, since we don't have a pantry (c'mon architect, seriously?), but shelves has been my dream for a long time. So finally this past week, I took down my family photo board and drilled in these babies!

 
I found an old plank underneath our shed, cut it in half, sanded down the edges, and bracketed it to the wall. It's perfectly sized too! My fav part are the mug hooks, which you can easily find at Lowes for a couple bucks. The shelf brackets cost $6 each, mug hooks were $3, so this whole happy project took less than $30 and less than 30min - my kind of DIY! Now my bright kitchen looks a little more like my dream kitchen. Thank you, Lord, for free wood, and free time!

Saturday, March 30, 2013

Sunday, February 17, 2013

Spicy Sausage 'n Cheese Pasta

This recipe was a Pinterest find, as are most of my trial recipes, and we really enjoyed it. It was sorta like a Mexican mac 'n cheese with delightful hits of salty sausage. We'd definitely do it again. The kids (ages 1 and 4yrs)  said it was too spicy, but they're wimps. My favorite part of making it was that it was SO simple! You don't boil the noodles ahead of time, just toss everything thing in a pot and simmer. This supper-procrastinating mama loved that, plus the noodles have lots of flavor from cooking in the broth. If ya give it a try, I hope you and yours enjoy it as much as we did!
Spicy Sausage Pasta
1 tbsp olive oil
1 lb smoked sausage, sliced
1.5 cups diced onion
2 tsp garlic powder
4 cups low-sodium, all natural chicken broth
2 (10 oz) cans Ro-Tel tomatoes and green chiles OR cilantro lime
1/2 cup heavy cream
1 box penne pasta (or whatever you've got in bite-size)
1 teaspoon white pepper (cut back on this if you have wimpy kids, like me)
 1 1/2 cups cheddar cheese, shredded
1/3 cup sliced scallions (optional)
1. Heat olive oil to an oven-safe pot (I use my beautiful, cast iron le cruset look-a-like from Aldi) over medium high heat until hot. Add sausage and onions and cook until lightly browned -you want that good color and roasted taste.
2. Add broth, rotel cans (undrained), uncooked pasta, garlic powder and pepper and stir. Bring to a boil, cover pot, reduce heat to medium-low, and add cream. Simmer until pasta is al dente, stirring occationally to keep it wet. Check for doneness at 12 minutes.
3. Remove beautiful blue pot from heat and stir in 1 cup cheese. Top with remaining cheese and sprinkle with scallions (I didn't have any on hand, but the inspirational recipe I adapted this from called for them, and I think they'd be a nice addition.). Broil until cheese is melted, lightly browned, and bubbly.
Makes 8 servings.

Thursday, January 31, 2013

Two Ingredient Banana Pancakes (Gluten Free)

     
 This is one of those "no excuses" recipes - meaning you have no excuse for not trying it because: (a) it's good for you, and (b) it's so easy a four year old could do it. And she did do it, my four year old that is. Also, if you're one of those folks who unfortunately can't have gluten in their diet, you have even less excuse because, seriously, you can't eat like anything good and here's a recipe for something good you could eat.... so make it. (If, by chance, you're one of those folks who is voluntarily avoiding gluten for some trendy (crazyinthehead) reason... seriously?? Live for those who cannot! BAGEL! BAGEL! BAGEL! Okay, I'm done.) On to the recipe...


Yum. I saw this recipe on Pinterest, of course, and I love it's ease for the cubs. I can whip these up just as fast a a bowl of oatmeal, but I get more smiles. It's as simple as this:

Grab a banana and an egg, this will make one large pancake. (the recipe below makes two) A soft banana is best, easier to mash.

Begin mashing the two together in a small bowl. You can use a fork, but I like my biscuit mixer/ potato masher thingy.
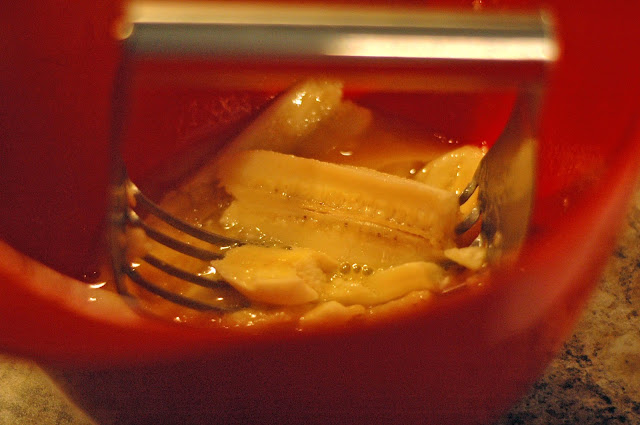

While you mash, heat a small skillet over medium heat and add a little pat of butter. Note: Please, people, use butter not oil or (heaven forbid) PAM. If you want that crisp, browning action, you need to use butter. It's really not as bad for you as the health department would like you to believe - fat is not the enemy, it's brain fuel, especially for children... but don't get me started. : ) Let that skillet get good and hot, and the BUTTER spread all 'round.

 Mash, mash, mix, mix, until the there aren't large banana lumps anymore.

Pour all the mix into the hot skillet, and let it cook on one side until browned, then flip. Mmm, look at that golden sweetness!

Serve immediately to happy toddlers! You can top your pancake how you'd like, Nutella, peanut butter, etc, we chose vanilla Greek yogurt as a "dip" instead of syrup - the cakes are quite sweet already being made of natural sugar! So how do they taste? A lot like banana bread, yum, and they're filling. They have the consistency of an omelet, easily cut and chewed. Also, they would freeze well, if needed, since the two ingredients freeze well.

Oh, don't let this snarky little handsome face fool ya... see that yogurt everywhere? Yeah, he thought his pancake was "Umm! Oood!"

Two Ingredient Banana Pancakes
Makes 2

Butter for pan
2 bananas
2 eggs

Heat butter in skillet over medium heat. Mash bananas and eggs together with a whisk or fork in a bowl until smooth. Pour half of mixture into skillet and cook, flipping half way through after the first side is browned. Follow with the rest of the mix, making the second pancake. Serve immediately with topping of your choice. Enjoy!

Sunday, January 20, 2013

10 Minute Slouch Beanie DIY


I love me some goodwill; both the happy feeling and the thrift store. Weeeell, their prices could be a bit better since they are, at times, the same as Walmart, but often i still find cheap treasure. While there recently, I snagged a couple of old, thick sweaters to make into beanie hats for the kids... and, okay, for me too. It was an easy 10 minute project, and hard to mess up, yay. (perfect for this sloppy sewer) Here's how i went about it...


- grab an old sweater, flip it inside out
- use another hat as your template for size and line it up with the bottom of the sweater (NOTE: for a slouchy look, I cut my hat several inches taller than the template hat)
- cut it out. ugly edges are fine, just try to make both sides fairly even
- pin the two pieces together
- use a small, straight stitch (stitches close together), and sew yourself a beanie!


hope y'all like yours as much as I like mine! and I promise Eva liked hers too, but she wouldn't let me take a picture that could convince anyone of that. stinker.


Saturday, January 12, 2013

Easy Cajun Beans and Rice

Stromboli. I make a mean one - homemade semolina dough, two kinds of meat, cheese, and homemade marinara. The Huz worships those loaves of chewy Italian goodness, as well he should, but this recipe, however, is not that one. This recipe was one I whipped up in 20min, fridge to table, on a night that my former supper plan came to a sad end. I left dough to rise for that fantastic stromboli...aaaaaaand left it forever and it dried out. Fail. (and by left it forever, i mean more than 24hrs in a warm oven. don't ask.) Happily, my two big men and I loved this quick-fix supper, and we're adding it to the rotation. I shared it's spicy gorgeousness on Facebook and y'all asked for the recipe, so here it is! One warning, it is rather hot, we like our Cajun seasoning, so taste as you go. Eva couldn't eat it (yogurt for supper!), but Dre took the heat like a champ. Hope you and yours dig it! This grainy photo was all I got, folks, but you can still tell it was deeelish.
 
Photobucket
 
Easy Cajun Beans and Rice
(brought to you by the fruit of forgetfulness and blessed creativity.)
 

1 smoked kielbasa sausage, sliced

3.5 - 4cups cooked brown rice

2 cans black beans, drained and rinsed

2-3 TB Cajun seasoning (more or less to taste)

1 can chicken broth

½ cup sour cream


Heat skillet over medium high heat. Add slices of kielbasa, and brown for several minutes. Add rice and drained beans and mix. Sprinkle Cajun seasoning over mixture, followed by broth, and blend. Allow to simmer for 10min or until heated through. Stir in sour cream and taste. Add more Cajun seasoning if desired. Serve with honey cornbread and enjoy!


Sunday, November 25, 2012

First Book!!

well folks, after a week of really late nights, my first book is finally completed and even (self) published! yeah, it's a little blurry, but looky here....


  in case you can't read through the fog, i'll make it big and beautiful here for ya.... it says, "Advent: Remembering How Jesus Came and Will Come Again - 25 Daily Readings for Families to Share at Christmas Time." yup, that's what i wrote - 64 pages of stuff about Jesus and Christmas mixed with a heavy dose of scripture. i've been working on it off and on for about a year, and ya know what, y'all? i'm pretty proud of it. okay, really proud of it.

woo hoo! look at me, ma! i'm a writer!

i started this little book because i love the tradition of reading the nativity story during the Christmas season, but i wanted to be able to teach my own kids more of the whole story of why Jesus came on Christmas. i looked around for a book to read with them as we did our little advent "calendar" through december, but i couldn't find anything that i liked, so, the huz and i talked some theology, and my "Advent" book was born. and since kids like pictures, i doodled some of those in there too. so did eva actually, as you can see, on the front cover. so it was really nearly a whole family endeavor in some ways.

if you'd like to see a preview of the book or buy one for your family, you can find it here on blurb.com in my own little book store! (how cool is that?!?)

here's the book's description:

   "Start a new family Christmas tradition with this great little book magnifying the glory of God's great plan of salvation through the sending of His Son, Jesus.

   This book is setup for daily reading, starting the first day of December, and going through Christmas day. Instead of focusing solely on the Nativity story, the author has sought to tell the bigger picture of God's redemption plan beginning in the Garden.

   Broken into five sections, (Why is Jesus Important? / He is Coming! / Meeting Baby Jesus / What is He Like? / What Happened to Him?) "Advent" begins with God's promise of salvation at The Fall of Adam and Eve, and ends with the Great Commission. Each day has a theme, scripture, and symbol to tell a different piece of the story of Jesus. Also woven in are pieces of Christmas tradition history (Candy Cane History / Evergreens Symbolism), as well as a section of Christmas carols to sing along with corresponding days.

   The author's own delightful little color illustrations are found on each page and are also included in the back to cut out for use with an advent calendar.

   From the author: I sincerely hope you and your family are benefitted by this book as you seek to make the Savior the center of your Christmas celebrations together."

Friday, October 12, 2012

Easy Ruffle Shorts in 10 Minutes

Y'all, i am NOT a short shorts kinda gal....mostly because Jesus told me I look cuter in longer shorts, but also because I'm half-ginger rather pale and freckly. As I like to say, with a hearty chuckle, "These thighs bless few eyes." Teehee. Anyway, if you're like me and prefer more length on your shorts, then you've probably noticed there are two options out there: Bermuda shorts (they hit right above the knee - a fine look, but limited.) or what I call "classic" shorts (you may know them as "Mom" shorts, a take-off from "Mom" jeans - high waisted, thick, rather roomy, and not typically fashion-conscious. An unfortunate few are still constructed with the use of elastic in the waist. Girls! That look does nothing good for your hiney! But I digress...) Classics shorts are at best bland and at worst the worst, but they do provide a "canvas" to work with as I did here...
 
Frustrated with the selection in the stores, in recent years I've taken to making my own shorts out of old wide-leg jeans, though those are getting harder to find with the whole skinny jean craze. This summer I just couldn't find any wide-legs, so I bought these "classic" shorts at the thrift shop for $2. Not bad, but they were a little wide and a little long. An easy way to fix both of these problems typically, is to simply roll them legs up a bit, but inspired by a trend of ruffly shorts on Polyvore, I decided to give these an added touch.


Some pins and fabric glue assited in the transformation, as you can see here. Note: It's really important to try them on with the lace pinned lik this so you can see what the final length will look like on your body. Just look at that smiling lace! So happy to be hangin' out with me. Teehee again, no?

And there they were! Tada! The whole thing took about 10min.
 Of course this look is so customizable for personal preferance. I was pretty happy with out they turned out, might try adding a touch of lace to my little girl's shorts too!
 So there you have it! My little...
Hope ya liked it!

Wednesday, September 19, 2012

Curry Crunch Chickpeas

lately i've been on the hunt for healthy snacks i can munch during my prized quiet "exercise hour"  in the afternoon. (okay... i'm not really working out, i'm couching-it watching man vs wild) well, thanks to pinterest, there are a lot of fresh ideas out there like this one: roasting chickpeas.
 
i'll admit, these didn't sound much good to me, but i went ahead and made them today, and i'm quite happy to report that not only were they super easy to make, but they were delightfully flavorful and satisfyingly crunchy. and hey! they're high in fiber and have some good protein to grow those muscles i'm working on. (yeah, right.) if you don't like curry or spicy, there are a lot of other variations out there that are worth a try, or you could make up your own version! i plan to test out chili lime and tex-mex next, but this flavor below will definately be made again. hope y'all like 'em!
 
Curry Roasted Chickpeas
 
Curry Roasted Chickpeas Using Canned Beans
(adapted from here)
Preparation time: 5 minute(s) | Cooking time: 50 minute(s)
Makes 6 servings.
 
1 can chickpeas, drained and rinsed
1 tsp olive oil
1 teaspoon curry powder
1/2 teaspoon cumin
1/4 teaspoon cayenne
1/2 teaspoon salt (optional)

Preheat oven to 400F. Combine all ingredients in a mixing bowl and mix well. Cover a baking sheet with parchment paper or foil and spread chickpeas out in a single layer. Bake, stirring every 15 minutes, until golden and crunchy (Test for crunchiness. They shouldn't feel stale in your mouth. Tf they do, add 5min more until they're right.). About 50 minutes worked for mine. Cool completely before serving.
Per serving: 3g Protein; 3g Fiber.
if y'all decide to go ahead and make 'em, let me know how ya like 'em! maybe i'll even send ya a baked chickpea veteran t-shirt? perhaps "bean there, done that" across the front? (i apologize for that.)

Tuesday, July 10, 2012

quotable prints for etsy

you might recognize these paintings... i've gone and made 'em into quote prints


Monday, April 30, 2012

Homemade Cajun Baked Potato Chips


What is it about the good ol' fried tater that make the American heart sing? Oh yeah, it's the blessed flavor and texture and smell and everything that there is to love about fried potatoes! Most folks say frying food is bad for you, personally, I'm of a different mind, but we won't get into that here. The only complaint I have is that deep frying not easy to do right without buying something fancy. So I don't deep fry much, but a girl still needs her oily, salty, crunchiness fix a few times a month, okay, a week..and thus this recipe was born. It's not difficult, and if you have a mandolin slicer (like i does) it's really a total breeze. Give it a try yourself with some of those near-rotting potatoes lurking on the floor of the pantry growing their freaky eyes. (do it now. they're only going to get scarier down there.)


Homemade Baked Cajun Tater Chips
Makes approx. 4 servings.

Gather:
3-4 small or 2 large taters (I use Yukon Gold because of the fantastic flavor)
Olive Oil (about 2-3 Tb)
Seasonings of your choosing (I used salt, pepper, and of course, Cajun seasoning)

Preheat oven to 400°. Using half your oil, grease a foil-lined cookie sheet – be generous or these babies will stick. Wash potatoes, and slice ‘em in half.  Grab your mandolin slicer (gosh, I love that contraption) 

and set it for ¼ inch or use a chef’s knife…and make chips. Lay chips in a single layer on the greased sheet. Brush the rest of the oil on the sliced chips and sprinkle with seasonings, salt, and pepper. Slide ‘em into the oven to bake for 15-18min or until the outer edge chips are browning slightly. Remove from oven and let ‘em sit for a moment to finish crisping. (If you move them too soon they can rip.) Scoop ‘em off the foil and place ‘em on a paper towel to soak up excess oil before serving. Serve immediately with Virginia's own Dominion root beer for most enjoyment!


Tuesday, April 17, 2012

To Make: Homemade Yogurt Pretzels


UPDATE: As several of you have posted in the comments, and as I myself experienced when I did make them, these puppies go stale FAST. If anybody finds a way around this, let me know! Also, some of you put the wire rack in the oven without the cookie sheet under it, and all I have to say to that is... uh, don't forget the cookie sheet!

sumpthing i'm dying to try is making yo-go pretzels. i have sweet childhood memories of my mom loving to eat and lovingly sharing little bags of these goodies we would buy from the sweet shop at the mall. the ones i find at the store don't taste as good as those from my yesteryears tho, so i've wanted to try my hand at making this snacky to share with my own cubs. plus, as you've recently read, i'm diggin' whippin' up my own homemade yogurt these days, so we have it on hand often! and have i mentioned that that stuff is the best yo-go i've ever tasted??? yerrrrmz!!! okay, focus on the food at hand. 

below is the recipe i plan to try with a barrel of pretzel sticks i got last week. (also bought because of happy memories, but now they're going to go stale because i like the idea of them more than the actuality. "emotional purchasing much, Em?" yup.) recipe via a bunch of places on the web. really. it's the same recipe on like nine sites....

Yogurt Pretzels

Ingredients
10 dozen small pretzels
2 cups yogurt
5 cups confectioners' sugar

Directions
Preheat oven to 250°F.
In a large mixing bowl, mix the confectioners sugar into the yogurt, one cup at a time with a hand blender.
Using tongs, dip the pretzels, one at a time, into the frosting and place them on a wire cooling rack with a cookie sheet under the rack to catch the excess frosting that will drip.
Once all pretzels are coated, turn oven off and place the wire rack on the cookie sheet in the oven, leaving the oven door slightly open. The excess heat will help the frosting dry without leaving the pretzels soggy.
Allow frosting to harden for 3-4 hours, remove from oven, and store pretzels in an airtight container for up to 3 days.

ALTERNATE IDEA:
Skip the oven, place dipped pretzels on a line cookie sheet and pop the sheet in the freezer for two hours. Store in an air-tight container in the fridge. 

Thursday, April 5, 2012

De-lish Homemade Yogurt in the Crockpot


yermz. that's our family word for yummy, and that's how my afternoon snack tastes ... right... now. i confess i had my doubts about how well homemade yogurt would taste, but y'all, lemme tell ya, iz gooood. at least my recipe is (cute face), which is why i decided to share it with ya. but better than the flavor, truthfully, is how EASY it is to make. don't "bleeve" me? (as my 4yr old says) try it for yo' self....

Easy Crockpot Yogurt
Makes about 4 cups

      Ingredients
  • 8 Cups Milk (any kind)
  • ½ cup plain or vanilla yogurt (any kind with live cultures, or use left over homemade yogurt)
  • ½ cup powdered milk (this is optional, use for thicker yogurt)
  • ½ cup honey
  • ½ cup sugar
  • 1 TB vanilla extract

Pour milk into crockpot and heat on low for 2 ½ hrs. When time is up, turn off pot and unplug it. Allow warm milk to sit covered for 3hrs to allow the temp to drop some. After that, remove 1 cup of warm milk and pour it into a medium bowl. Add powdered milk, honey, sugar, and vanilla and whisk until well combined. Pour sweetened mixture back into crockpot and whisk well to blend. Put the lid on, and wrap the unplugged pot in a thick towel covering the sides and top to insulate it. Allow the yogurt mixture to sit like that for at least 8 hrs or over night. When it’s done the yogurt is ready to eat, but it may be runnier that you like. You can strain it to thicken it.


To strain it, take a colander, line it with a white coffee filter or cheese cloth (or be cool like me and use one of those thin Ikea towels), and place it over a bowl. Then ladle your yogurt into the strainer and place the bowl/strainer combo into the fridge where your yogurt can cool. After several hours, the watery whey will strain out of the yogurt, leaving it nice and thick. Scrape the yogurt out of the coffee filter and into a container. If you want Greek style, dump it back into the strainer with a fresh filter and strain it again. Now save that whey (watery stuff), y'all! Use it in baking or smoothies in place of milk or buttermilk - it will add great nutrition without changing the flavor.

Yogurt will keep for 2 weeks. Whey keeps for 6 months in a sealed container. 

recipe adapted from alicia's method.


Monday, April 2, 2012

this month's canvases

this one is part 2 of a four foot tri-paneled commission for a girlfriend, and it was quite a handful. it takes a lot of work to make something look this thrown together. acrylics, water, paper towels bits, and house paint on canvas

this primary colored piece is huge. it's almost as big as me. i did this one just for fun one afternoon and i think it looks just like fun. adam says the more he looks at it, the more he likes it. when i took it down from the wall in our bathroom where it was hanging (too moist in there), he said, "no! don't take my happiness!" acrylics on canvas

this is an imagined, mid-western landscape from a daydream (hence the fish-eye styled framing). the only "west" i've visited is colorado, but i imagine that nevada or new mexico somewhere look like this. anyone been there? acrylics on canvas

aaaaaaaaaaand that's all for now.