Made this scripture photo for my little boy's room today... steal as you wish. : )
Showing posts with label my works. Show all posts
Tuesday, August 20, 2013
Saturday, May 4, 2013
Curried Cauliflower - It's like crack (not that I would know, Mom, promise)
Look at this stuff... take it all in. It tastes even better than it looks too, promise. Y'all mighta heard of roasting cauliflower in the oven before (it's the way to go, man. if you haven't tried it or curry isn't your thing, take the recipe below and swap the curry for Parmesan cheese), but this recipe is a variation with an added memorable kick of curry. Hope you give it a try!
Roasted Curried Cauliflower
Prep Time: 15 Minutes
Cook Time: 25 Minutes
Ready In: 40 Minutes
Servings: 8
Ingredients:
6 tablespoons olive oil
2 large heads of cauliflower, cut into bite-sized florets
3 Tablespoons curry powder (more if you'd like)
salt and black pepper to taste
Directions:
Preheat the oven to 450 degrees F. Cover a large cookie
sheet with foil. Toss olive oil and florets in a gallon ziplock bag until cauliflower is coated. Add curry powder, and salt and pepper and toss again. Pour
into the prepared cookie sheet, and sprinkle with more curry powder and salt, if desired.
Bake for 25 minutes, stirring halfway through. Broil for last 3-5min watching carefully so they don't burn. Enjoy!
Monday, April 29, 2013
Sunday, January 20, 2013
10 Minute Slouch Beanie DIY
I love me some goodwill; both the happy feeling and the thrift store. Weeeell, their prices could be a bit better since they are, at times, the same as Walmart, but often i still find cheap treasure. While there recently, I snagged a couple of old, thick sweaters to make into beanie hats for the kids... and, okay, for me too. It was an easy 10 minute project, and hard to mess up, yay. (perfect for this sloppy sewer) Here's how i went about it...
- grab an old sweater, flip it inside out
- use another hat as your template for size and line it up with the bottom of the sweater (NOTE: for a slouchy look, I cut my hat several inches taller than the template hat)
- cut it out. ugly edges are fine, just try to make both sides fairly even
- pin the two pieces together
- use a small, straight stitch (stitches close together), and sew yourself a beanie!
hope y'all like yours as much as I like mine! and I promise Eva liked hers too, but she wouldn't let me take a picture that could convince anyone of that. stinker.
Saturday, January 12, 2013
Easy Cajun Beans and Rice
Stromboli. I make a mean one - homemade semolina dough, two kinds of meat, cheese, and homemade marinara. The Huz worships those loaves of chewy Italian goodness, as well he should, but this recipe, however, is not that one. This recipe was one I whipped up in 20min, fridge to table, on a night that my former supper plan came to a sad end. I left dough to rise for that fantastic stromboli...aaaaaaand left it forever and it dried out. Fail. (and by left it forever, i mean more than 24hrs in a warm oven. don't ask.) Happily, my two big men and I loved this quick-fix supper, and we're adding it to the rotation. I shared it's spicy gorgeousness on Facebook and y'all asked for the recipe, so here it is! One warning, it is rather hot, we like our Cajun seasoning, so taste as you go. Eva couldn't eat it (yogurt for supper!), but Dre took the heat like a champ. Hope you and yours dig it! This grainy photo was all I got, folks, but you can still tell it was deeelish.
Easy Cajun Beans and Rice
(brought to you by the fruit of forgetfulness and blessed creativity.)
1 smoked kielbasa sausage, sliced
3.5 - 4cups cooked brown rice
2 cans black beans, drained and rinsed
2-3 TB Cajun seasoning (more or less to taste)
1 can chicken broth
½ cup sour cream
Heat skillet over medium high heat. Add slices of kielbasa,
and brown for several minutes. Add rice and drained beans and mix. Sprinkle Cajun
seasoning over mixture, followed by broth, and blend. Allow to simmer for 10min
or until heated through. Stir in sour cream and taste. Add more Cajun seasoning
if desired. Serve with honey cornbread and enjoy!
Sunday, November 25, 2012
First Book!!
well folks, after a week of really late nights, my first book is finally completed and even (self) published! yeah, it's a little blurry, but looky here....
in case you can't read through the fog, i'll make it big and beautiful here for ya.... it says, "Advent: Remembering How Jesus Came and Will Come Again - 25 Daily Readings for Families to Share at Christmas Time." yup, that's what i wrote - 64 pages of stuff about Jesus and Christmas mixed with a heavy dose of scripture. i've been working on it off and on for about a year, and ya know what, y'all? i'm pretty proud of it. okay, really proud of it.
woo hoo! look at me, ma! i'm a writer!
i started this little book because i love the tradition of reading the nativity story during the Christmas season, but i wanted to be able to teach my own kids more of the whole story of why Jesus came on Christmas. i looked around for a book to read with them as we did our little advent "calendar" through december, but i couldn't find anything that i liked, so, the huz and i talked some theology, and my "Advent" book was born. and since kids like pictures, i doodled some of those in there too. so did eva actually, as you can see, on the front cover. so it was really nearly a whole family endeavor in some ways.
if you'd like to see a preview of the book or buy one for your family, you can find it here on blurb.com in my own little book store! (how cool is that?!?)
here's the book's description:
"Start a new family Christmas tradition with this great little book magnifying the glory of God's great plan of salvation through the sending of His Son, Jesus.
This book is setup for daily reading, starting the first day of December, and going through Christmas day. Instead of focusing solely on the Nativity story, the author has sought to tell the bigger picture of God's redemption plan beginning in the Garden.
Broken into five sections, (Why is Jesus Important? / He is Coming! / Meeting Baby Jesus / What is He Like? / What Happened to Him?) "Advent" begins with God's promise of salvation at The Fall of Adam and Eve, and ends with the Great Commission. Each day has a theme, scripture, and symbol to tell a different piece of the story of Jesus. Also woven in are pieces of Christmas tradition history (Candy Cane History / Evergreens Symbolism), as well as a section of Christmas carols to sing along with corresponding days.
The author's own delightful little color illustrations are found on each page and are also included in the back to cut out for use with an advent calendar.
From the author: I sincerely hope you and your family are benefitted by this book as you seek to make the Savior the center of your Christmas celebrations together."
in case you can't read through the fog, i'll make it big and beautiful here for ya.... it says, "Advent: Remembering How Jesus Came and Will Come Again - 25 Daily Readings for Families to Share at Christmas Time." yup, that's what i wrote - 64 pages of stuff about Jesus and Christmas mixed with a heavy dose of scripture. i've been working on it off and on for about a year, and ya know what, y'all? i'm pretty proud of it. okay, really proud of it.
woo hoo! look at me, ma! i'm a writer!
i started this little book because i love the tradition of reading the nativity story during the Christmas season, but i wanted to be able to teach my own kids more of the whole story of why Jesus came on Christmas. i looked around for a book to read with them as we did our little advent "calendar" through december, but i couldn't find anything that i liked, so, the huz and i talked some theology, and my "Advent" book was born. and since kids like pictures, i doodled some of those in there too. so did eva actually, as you can see, on the front cover. so it was really nearly a whole family endeavor in some ways.
if you'd like to see a preview of the book or buy one for your family, you can find it here on blurb.com in my own little book store! (how cool is that?!?)
here's the book's description:
"Start a new family Christmas tradition with this great little book magnifying the glory of God's great plan of salvation through the sending of His Son, Jesus.
This book is setup for daily reading, starting the first day of December, and going through Christmas day. Instead of focusing solely on the Nativity story, the author has sought to tell the bigger picture of God's redemption plan beginning in the Garden.
Broken into five sections, (Why is Jesus Important? / He is Coming! / Meeting Baby Jesus / What is He Like? / What Happened to Him?) "Advent" begins with God's promise of salvation at The Fall of Adam and Eve, and ends with the Great Commission. Each day has a theme, scripture, and symbol to tell a different piece of the story of Jesus. Also woven in are pieces of Christmas tradition history (Candy Cane History / Evergreens Symbolism), as well as a section of Christmas carols to sing along with corresponding days.
The author's own delightful little color illustrations are found on each page and are also included in the back to cut out for use with an advent calendar.
From the author: I sincerely hope you and your family are benefitted by this book as you seek to make the Savior the center of your Christmas celebrations together."
Friday, October 12, 2012
Easy Ruffle Shorts in 10 Minutes
Y'all, i am NOT a short shorts kinda gal....mostly because Jesus told me I look cuter in longer shorts, but also because I'm half-ginger rather pale and freckly. As I like to say, with a hearty chuckle, "These thighs bless few eyes." Teehee. Anyway, if you're like me and prefer more length on your shorts, then you've probably noticed there are two options out there: Bermuda shorts (they hit right above the knee - a fine look, but limited.) or what I call "classic" shorts (you may know them as "Mom" shorts, a take-off from "Mom" jeans - high waisted, thick, rather roomy, and not typically fashion-conscious. An unfortunate few are still constructed with the use of elastic in the waist. Girls! That look does nothing good for your hiney! But I digress...) Classics shorts are at best bland and at worst the worst, but they do provide a "canvas" to work with as I did here...
Frustrated with the selection in the stores, in recent years I've taken to making my own shorts out of old wide-leg jeans, though those are getting harder to find with the whole skinny jean craze. This summer I just couldn't find any wide-legs, so I bought these "classic" shorts at the thrift shop for $2. Not bad, but they were a little wide and a little long. An easy way to fix both of these problems typically, is to simply roll them legs up a bit, but inspired by a trend of ruffly shorts on Polyvore, I decided to give these an added touch.
Some pins and fabric glue assited in the transformation, as you can see here. Note: It's really important to try them on with the lace pinned lik this so you can see what the final length will look like on your body. Just look at that smiling lace! So happy to be hangin' out with me. Teehee again, no?
And there they were! Tada! The whole thing took about 10min.
Of course this look is so customizable for personal preferance. I was pretty happy with out they turned out, might try adding a touch of lace to my little girl's shorts too!
So there you have it! My little...
Hope ya liked it!
Wednesday, July 11, 2012
Tuesday, July 10, 2012
Monday, April 2, 2012
this month's canvases
this one is part 2 of a four foot tri-paneled commission for a girlfriend, and it was quite a handful. it takes a lot of work to make something look this thrown together. acrylics, water, paper towels bits, and house paint on canvas
this primary colored piece is huge. it's almost as big as me. i did this one just for fun one afternoon and i think it looks just like fun. adam says the more he looks at it, the more he likes it. when i took it down from the wall in our bathroom where it was hanging (too moist in there), he said, "no! don't take my happiness!" acrylics on canvas
this is an imagined, mid-western landscape from a daydream (hence the fish-eye styled framing). the only "west" i've visited is colorado, but i imagine that nevada or new mexico somewhere look like this. anyone been there? acrylics on canvas
aaaaaaaaaaand that's all for now.
Thursday, March 22, 2012
Overhead Light Re-Do
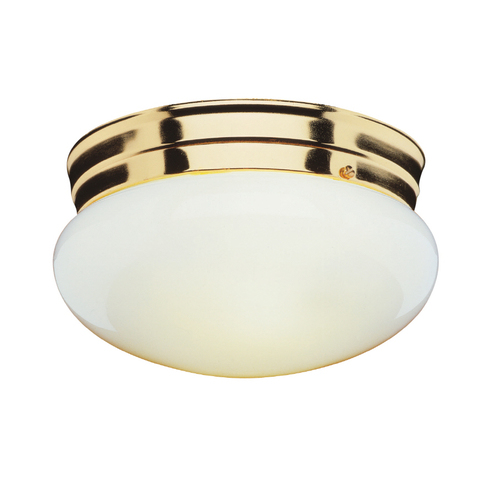
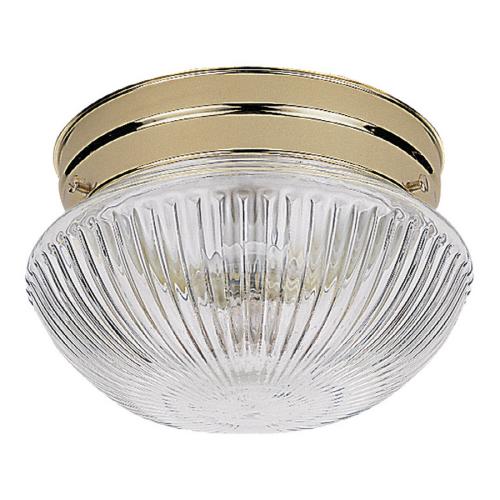
everyone has at least one of these in their house, right? right? oh, please don't tell me i'm the only one... actually, i've got TWO. ugh. yeah, i'm not a fan of this brass 'n glass style from the early '90s, plus they were clashing with my rich oiled-black hardware and old-world rustic light fixtures that we installed all over the house when we re-did the place three years ago. something needed to be done, and done cheaply.
i scoured thrift stores and discovered this breath-taking antique pendant that i was able to take apart and use in place of the other globe. a REAL score for $10!! (that black ceiling collar used to be the brass one that went with the ugly globe, see below for it's transformation)
so what happened to the other one? well, i couldn't find another stunning antique globe, so i came up with another solution using stuff i had layin' around. employing a can of matte off-white and a can of satin black spray paints, this globe got the tszuj-ing (pronounced "jooj-ing") it needed. tada!
it has a softer glow now and a 20's vintage train station vibe that fits with the rest of Campbellstown nicely. it blends in with it's beauty, rather than sticking out like a sore thumb... that you hurt in the 90's. and it was so easy to do!
more details? mkay, here's the break-down.
1. turn off the power (at the breaker) to your fixture. (don't come whinin' to me 'cuz you got yourself killed while tszuj-ing.)
2. remove glass globe, carefully, and shake out the bugs. (oh you know they're in there. you've been lookin' at 'em for years... again, i can't be the only one.)
3. clean and dry globe thoroughly.
4. remove light bulb, then detach brass fixture collar from ceiling and disconnect from power. clean collar and sand off any old paint. stuff light bulb hole with tissue to keep paint out.
5. using 3-4 thin coats, spray-paint outside of globe with white paint, allowing time to dry between coats.
6. do the same to the fixture collar using the black paint, but avoid getting paint into light bulb socket. also, spray the screws and hardware if they show.
7. after all has dried, reassemble the fixture collar and (carefully) test the power. if all is well, reattach the newly-frosted globe and enjoy that "vintage" glow!
note: this method would also work for other fixtures like those flush-mount dome type....
from lowes.com
happy tszju-ing, y'all!
Saturday, January 14, 2012
Latest Strokes
over december i've been painting a lot. i'm still not much good at it, but i'm learning and having fun, so yay me. : ) this one i made for my father-in-law for christmas. i'm not in love with this one, but it made him happy, so it was worth it.
this is actually an old one i dug up recently. painted a silhouette on my diaper bag.
my mama loves red, so...
and i made this wash-style for an online art initiative i'm enrolled in that puts up a new project each month to keep us "part-time artists" building our portfolios. check it out and join in with the Racquet here. this past month's posted project idea was to communicate the relationship between opposites. i chose the opposites light and dark, and fear and calm and tried to create those feelings in the water and woods of this piece.
Monday, December 12, 2011
Silk Flower Craft (and selling them at Beaucoup Vintage)
after reading this kewl tutorial from the simply vintage girl, i've been whippin' out a lotta these lately...
i got so many compliments and people asking if i sell them, that i decided to try just that. so i made this adorbs (if i do say so myself, and i do) display....
went downtown to an also adorable and girly little store called Beaucoup Vintage.... and Megan (the shop gal) loved 'em!
Here they are selling out fast! I've already had to restock 'em twice since October.
i was so inspired by my happy luck, that i also decided to open up an etsy shop. (see Em sell here)
try the tutorial yourself! it was so easy and fun. hot tip: go to joann fabrics and ask for a sample of the silk fabrics you find (anything with "silky" in the title or satin) for this craft and they will give 'em to you for free! (up to five 4in wide strips) a free, fun, feminine, flower craft? yes, please.
Monday, October 24, 2011
Subscribe to:
Posts (Atom)